Customizing the Summary Views
Summary pages provide a convenient way to see many records at one time, whether they are work orders, parts, or PM procedures. There are various ways to customize summary pages to allow you to control how your data is displayed. Once you have customized your summary page, you can then export the data to create a quick and easy report, if necessary.
Managing Columns
*Note: The Work Order summary page's column chooser is managed differently than the standard column chooser.
- Moving Columns - Click and drag any column to the desired position in the summary page.
- Adding and Removing Columns - Click the Columns button to choose the fields that are displayed as columns on the summary page. The Column Chooser will show any fields that are currently not showing on the summary page.
- To add a column, click and drag a field from the Column Chooser to the desired position on the summary page.
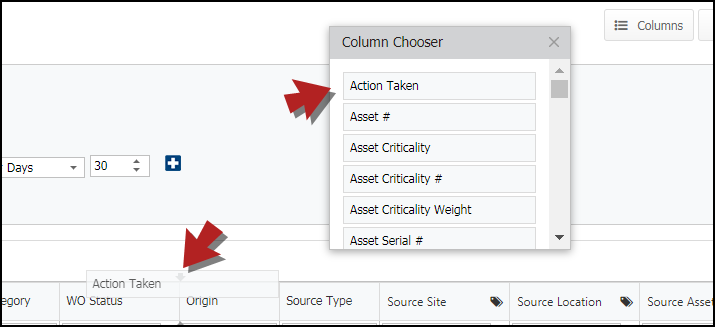
- To remove a column, click and drag a column from the summary page into the Column Chooser.
- Sorting Columns - Click on the column title to sort the data ascending. Click on the title again to sort the data descending.
Managing Columns on the Work Order Summary Page
- Moving Columns - Click and drag any column to the desired position in the summary page.
- Adding and Removing Columns
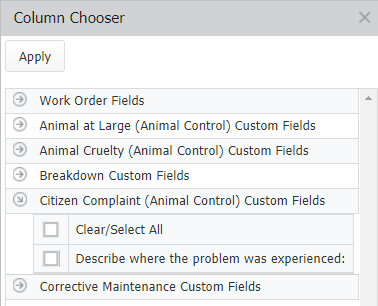
- Click the Columns button to choose the fields that are displayed as columns on the summary page. Work order fields and global custom fields will be bundled under the Work Order Fields grouping. Work Categories with specific custom fields will appear as groupings in the Column Chooser, and if the Work Category is Site-specific, the Site name will appear in parentheses next to the Work Category name.
- Check the box next to the columns you would like included in the summary view and click Apply.
- To remove a column, uncheck the box next to the columns you would like to not appear on the summary page.
- Sorting Columns - Click on the column title to sort the data ascending. Click on the title again to sort the data descending.
Search and Filter
Search
The Search button allows you to quickly find an item on a summary page if you know something about the item(s) you are looking for.
- Click the Search button to show the search tool.

- Select the field you would like to search by from the drop down menu.
- Enter the information you are searching for in the text box.
- Click the Apply button. *Note: You can choose to ignore filters already in place by leaving the Ignore filtering checkbox checked.
Filter
- Column Filters - Some columns on the summary page can be filtered individually.
- Depending on the column, you will need to either type in the text box or select an option from the drop-down menu to filter the information in that column. *Note: Column filters can be configured to display in a drop-down list through your My Profile page in the Custom Settings section.
- Click on the filter icon (
 ) to choose only those records that do or do not meet some criteria. This is helpful if you cannot remember the name of the item displayed, only remember part of the name, or includes (or does not include) certain characters.
- Advanced Filters Button - The Advanced Filters button is another way to narrow down which records display on a summary page. *Note: If you do not have a view selected on the summary page, the Date Type field will default to Originated with a Date Range of the last 30 days.
- Click the Advanced Filters button to display the Advanced Filter tool.
- The filterable fields will vary depending on the summary page you are viewing. Select your filter(s) from the available fields.
- Click Apply to filter the summary page based on your selections.
Bright Idea:Each summary page in Asset Essentials has a different set of filterable fields in the Advanced Filter tool. The most commonly used filterable field is Date Type. Listed below are the definitions for date types that are included on the Work Order summary page:
- Originated - This represents the date the work order was created.
- Assigned - This represents the date that a user was assigned to the work order.
- Completed - This represents the date when the work order was completed.
- Expected - This represents the date that a work order is expected to be completed.
- Created on - This represents the date the work order was created and is defined on the back end of Asset Essentials.
- Last modified on - This represents the date when the work order was last edited.
- Create Filter - The Create Filter tool is designed to help you build more complex filters that can include multiple items when filtering in a single column. For example, you can create a filter to include multiple work order statuses in the results, such as New Request and Pending Approval. There are many options when customizing your own filters. The steps listed below describe the most common use case for creating filters, which is including multiple items from one column or omitting multiple items from one column. *Note: If you do not see this feature in your account, contact Client Services to get this feature activated at no charge.
- Click the Columns button, then click the arrow next to Work Order Fields. The columns that you make visible will control what available options you have to filter by in the following steps.
- Check the boxes next to the fields you would like to filter by in the list.
- Click the Create Filter link in the bottom left corner of the work order list.
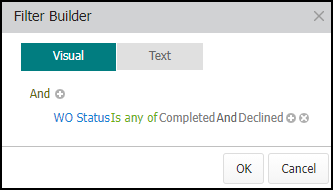
- The window will already have the "And" command by default displayed. Click the plus sign next to the "And" command.
- Click the first hyperlink in the line item that appears and select the column header you need to filter by.
- Click the second hyperlink in the line item that appears and select the appropriate command. We recommend using Is any of if you want to include multiple items from one column or Is none of if you want to omit multiple items from one column.
- Click the enter a value hyperlink to select or type in your first item. The column type you have selected to filter by will determine whether you select the item or type in the item.
- Click the plus sign next to your first item to select or type in your second item. Continue to click the plus sign to add more items, if necessary.
- Click OK to filter your list.
Customizing Views
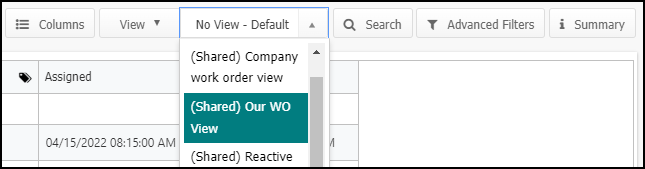
Asset Essentials allows you to save commonly used search and filter settings as a View. Instead of frequently selecting the same search and filter selections, you can choose a saved View from the drop down menu to automatically apply those settings to a summary page.
How to Save a View
- Click the View button.
- Select New.
- Enter a Name for the View.
- If you are creating a View that is not based on a search or filter, check the Save selected items box to create a page View that will only display those selected items.
- Check the Set as My Default box to automatically display this View when navigating to the summary page.
- Check the Available to others box to share this View with other users.
- Click OK to save the View.
